
Autumn Gold sleeveless waisted kirtle started 7/24/2019. Worked on sporadically, and then finally finished on September 25, 2019.
Details:
– kirtle will be side laced.
– edges will NOT use bias binding
– this one will use one layer of interlining in the whole bodice and a second layer of interlining at the center front. I’ll be pad stitching them together (conjectural).
– this one will use an inverted box pleat at center back with knife pleats evenly on either side.
While at West An Tir War 2019 I took a class from Lady Taran who discussed padstitching. The method and the discussion made me want to try out padstitching my next bodice. Since I don’t want these stitches to show through on the fashion layer I’m instead planning to use two layers of Fabric-store.com 4C22 linen as my interlining and pad stitch them together. I literally don’t know what I’m doing but I have a hint of an idea and I’m faking my way through it.
AUTUMN GOLD kirtle TODO:
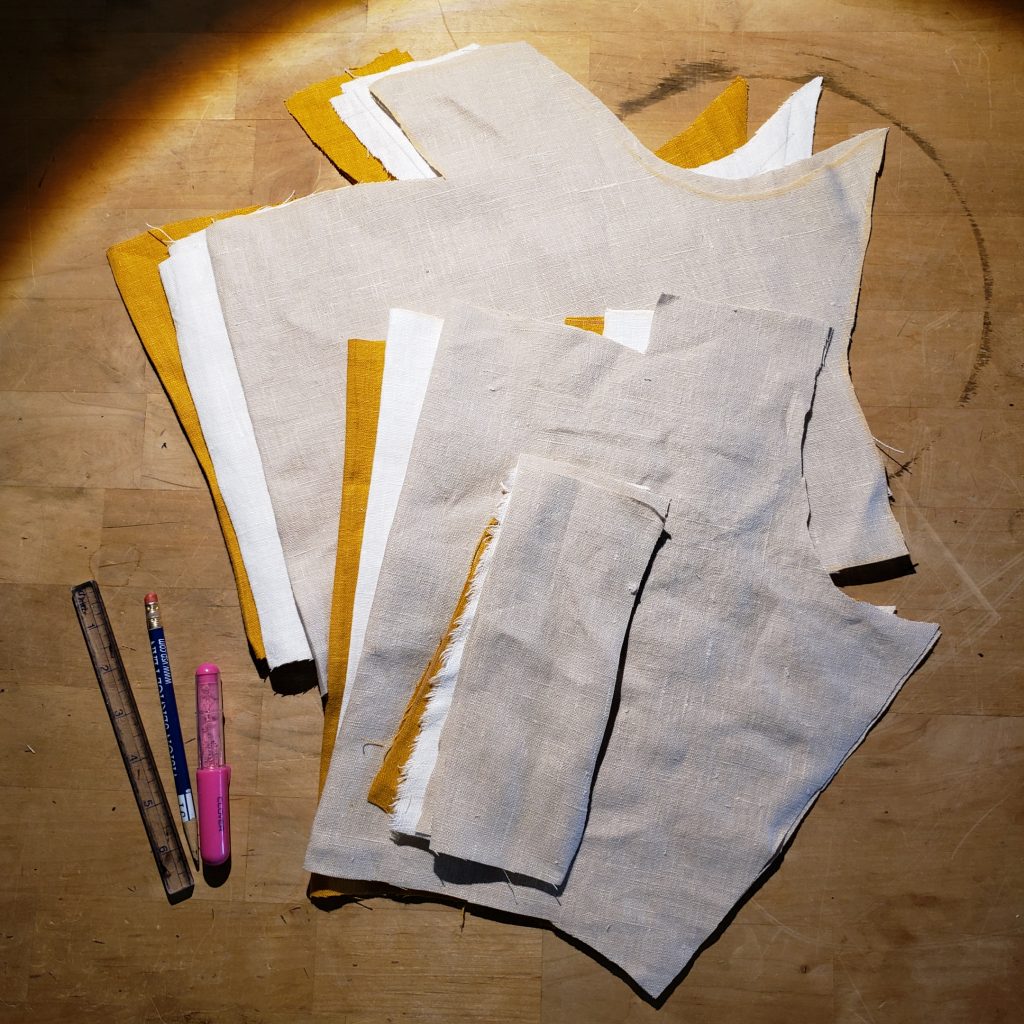
- (done) Wash and iron fabric (4 yards fashion fabric, 1 yd each lining and interlining necessary)
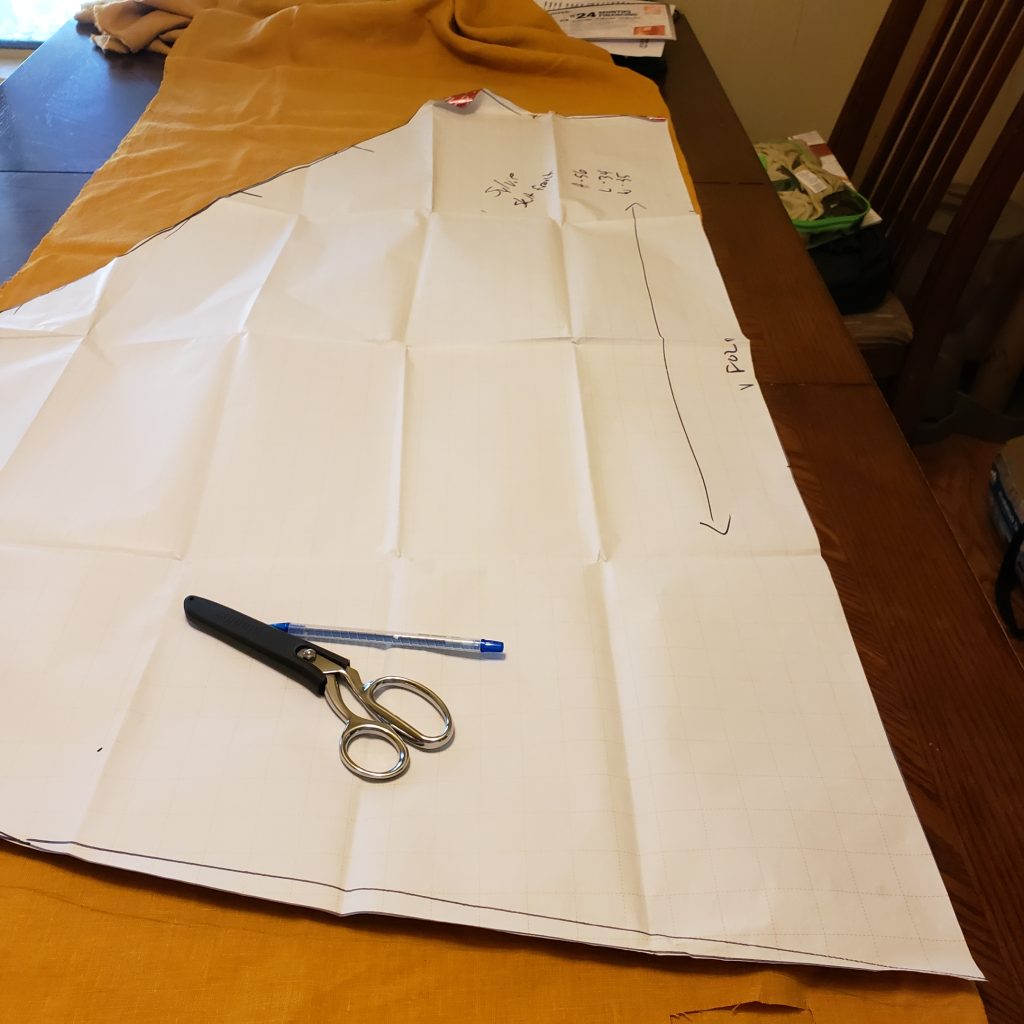
Bodice - (done) Cut out the bodice (fashion fabric, lining and two layers of interlining). Use the pattern to cut out the fashion fabric. Then use the fashion fabric to cut out one layer of the interlining and then follow the pattern on p. 122 of The Modern Maker vol 2 to cut out the second layer of interlining. Then use the full interlining fabric to cut out the lining. This will make each subsequent piece slightly bigger than the piece it was traced off of and will help the pieces to lay nicely together.
- (done) On the full interlining, mark your seam allowance (1/2″ marked with magic ruler) this will make the next steps easier. Make sure your marks will not bleed through the other layers (ie, use pencil or chalk).
- (done) On the partial interlining remove the seam allowance from top and bottom.
- (done) On the full interlining, sew a reinforcement stitch on the inner corner of the neck opening to prevent the neck from ripping out at that sharp corner. Make sure this reinforcement is inside of where the corner will get clipped.
- (done) baste and then pad stitch the interlining pieces together. Follow instructions from MMv2 p. 122.
- (maybe) On the interlining, sew a square of the fashion fabric into corner of the foundation layer to keep the interlining from peeking through (seen here: Wasted weeds: The Impromptu “Greensleeves” kirtle) With the full lining this turned out to be unnecessary but I want to keep this link here for future bodice so I don’t lose it.
- (done) baste interlining and fashion fabrics together
at ~1/4″just outside of the seam allowance mark on the front, back and straps. Note that the side with the diagonals for the pad stitch (corrugated side) should end up against the body. - (done) Iron all the pieces so that the fashion fabric and interlining are the same and act as a single piece of fabric.
- (done) Sew the straps to the front and back. Press and prick stitch the seams open.
- (done) On the fashion fabric, fold the neck, armseye and side openings back to the 1/2″ seam allowance. Clip the corners of the neckline and curves and press to get it to lay flat.
Bodice Lining - (done) On the lining, sew the straps on the front and back. Press open.
- (done) On the lining, fold the neck, armseye and side openings back to the 1/2″ seam allowance. Clip the edges and press to get it to lay flat.
- (done) Sew the lining into the fashion fabric/interlining along the neck and side openings.
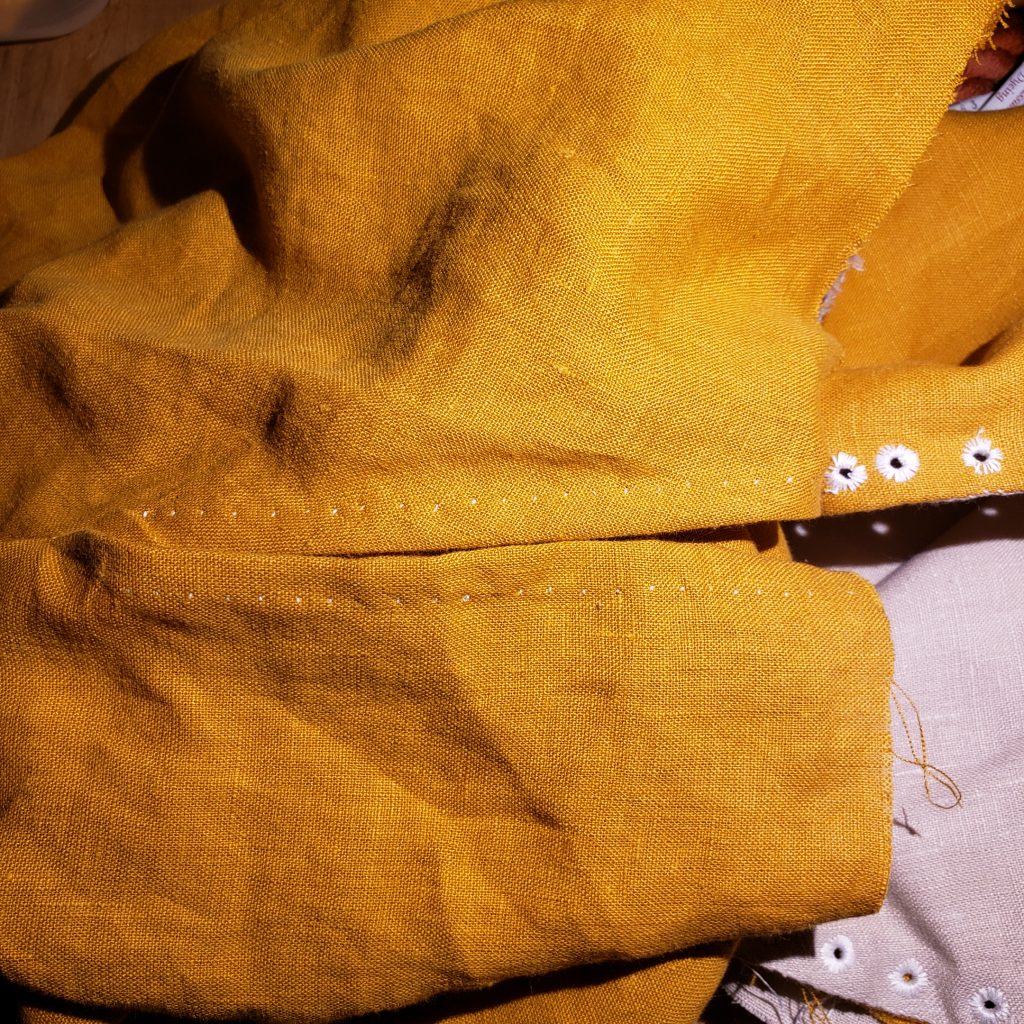
- (done) Add eyelets to the bodice. (1/4″ from the edge, 3/4″ separated offset for spiral lace)
Skirt - (done) Cut out the skirt(fashion fabric). Front should be cut on a fold to eliminate the center front seam. Ideally the width of the front panels will match the width of the front of the bodice.
- (done) Piece the skirt pieces.
- (done) Sew skirt back pieces together with french seam (1/4″ then 1/2″) on the bias edges (this will be the center back, bias-to-bias for better swoosh).
- (done) Sew a rolled edge on the top 6 inches on the front and the back skirt portions on both sides.
- (done) Sew the skirt front to skirt back together except for the finished edges with a french seam 1/4″ then 1/2″).
- (done) Attach the skirt to the bodice fashion fabric (Put a reverse box pleat at the center-back and then divide and conquer knife pleat either side to fit the top of the skirt evenly across the back of the bodice. It should fit pretty close on the front edge ).
- (done) Hand sew the bodice lining bottom edge front and back to enclose the skirt seam (felling stitch or whip stitch).
- (done) Hem the dress with a small double-fold hem.
- (done) Mark the hem and adjust for a tuck about 6″ above the floor level which will bring the skirt bottom up to floor level.
COSTS
IL019 AUTUMN GOLD FS Signature Finish – 100% Linen 4 yds $49.99 (purchased July 2019)
4C22 Bleached – 100% Linen 1 yd – ~$8 (purchased May 2018)
IL019 SAND SHELL Softened – 100% Linen – 1 yd ~$4.55 (purchased March 2014)
LEARNINGS (AKA TRIALS AND TRIBULATIONS)
7/13/2019
Tonight I storted through my stash and realized that I don’t have enough fabric in the right color to make this new kirtle. So fine. I’ve ordered 4 yards of Autumn Gold FS Signature Finish IL019 linen from Fabric-store.com. It should be here in a few days. Once it arrives I’ll use the same pattern I used for my Cobalt kirtle no. 2. Because these are practically identical (and I haven’t changed sizes in the last two weeks) it will require zero updates.
7/18/2019
Today the fabric arrived. It’s in the washing machine now.
7/24/2019
Tonight I cut out the bodice fashion fabric, lining, interlining. I also reviewed the Modern Maker vol 1 instructions for pad stitching and Modern Maker vol2 pattern for pad stitching the front of a woman’s bodice (p. 122). I think I understand them. Based on his notes I modified my plan. Instead of two full layers of interlining(and pad stitching) across the whole bodice I’ll instead add the second layer of interlining (and pad stitching) only to the center front.
7/25/2019
Added reinforcement stitches to the inner corner of the neck. Started pad stitching a sampler (so I know what I’m doing on the interlining).
Bodice pieces 
Adding reinforcement stitches to the inner corner of the neck. 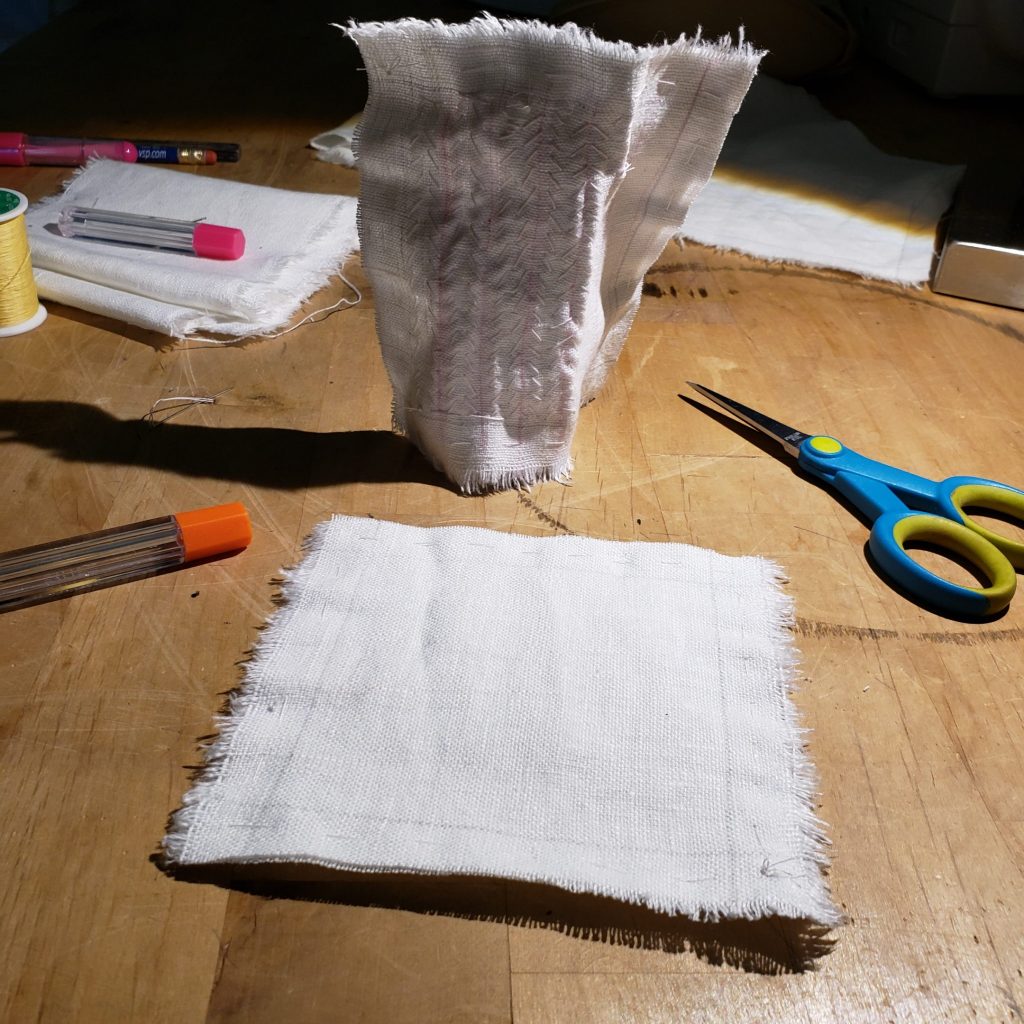
Pad stitching sampler.
7/26/2019
I made a pad stitch sample. In the image, foreground, two pieces (5″x5″) of Fabric-store 4C22 basted together(limp as a wet noodle). Standing behind it, same thing only with pad stitched at 1/4″ intervals. The pad stitched piece is so much more rigid than the unstitched piece it can stand on its own. This allowed me to figure out how to do the method on a smaller piece so that I know what I’m doing on the bigger piece.
8/1/2019
I finished half of the pad stitching on the front panel. I literally started it tonight and finished half of it (I’ve been busy with other non-sewing projects). This isn’t hard.
8/5/2019
I finished up the second half of the pad stitching.
8/21/2019
Other things interfered with this project so it got back-burnered for a bit. I’m finally back to it.
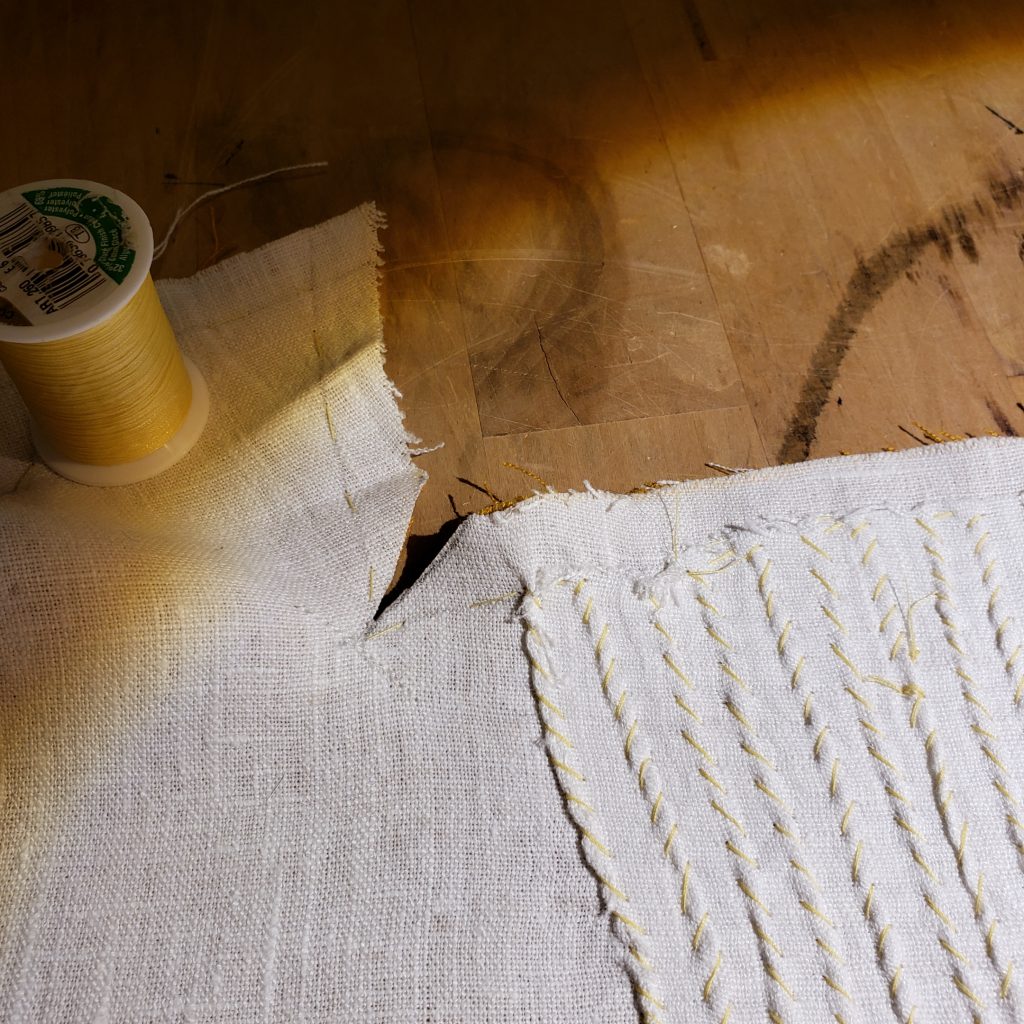
I basted the front piece outer fabric and interlining. Just as I did on the Cobalt no. 2 kirtle I’m again planning to flip the seam allowance to the inside of the bodice. So this time I did the basting stitch just outside of the seam allowance mark (instead of in the middle of the seam allowance). I think it will work out better to not snip the basting stitches when I nip the curves. Putting the baste just outside of the mark should make this possible.
8/22/2019
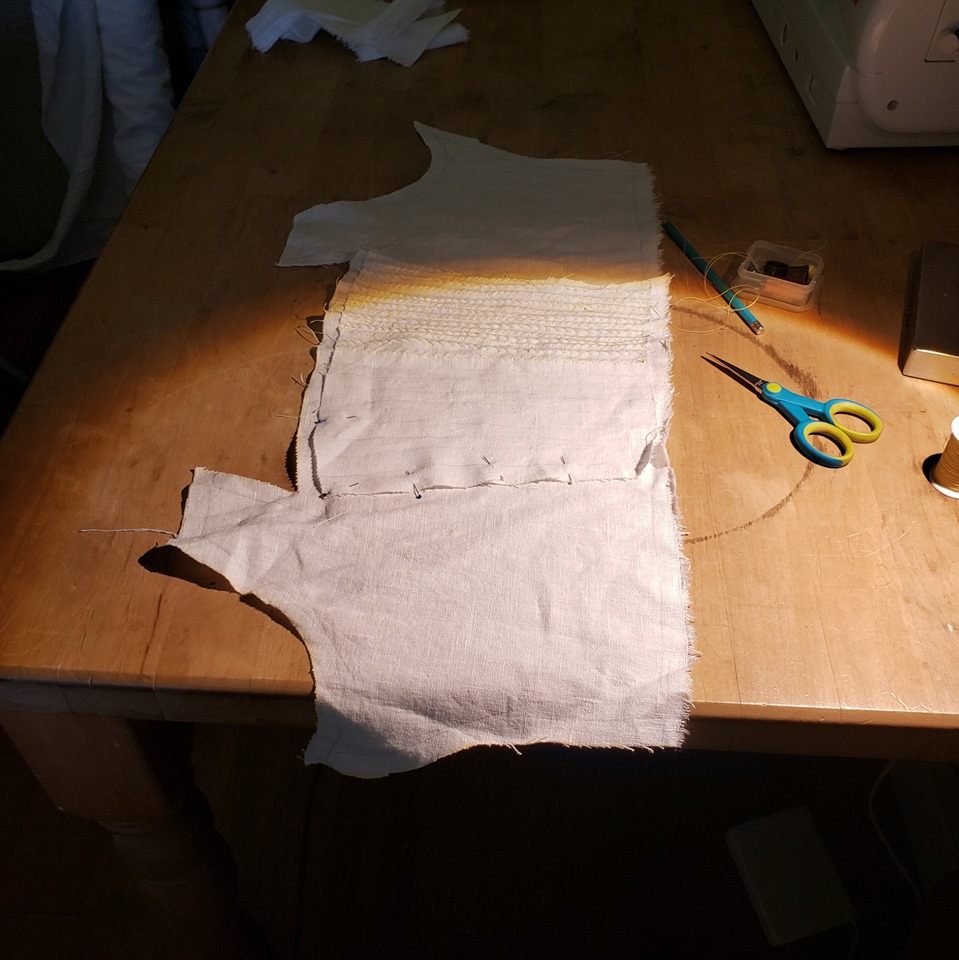
I basted the back and strap pieces fashion fabric to interlining and ironed the heck out of everything. All the pieces are now lying nice and flat.
Padstitching half done 
Done padstitching the front 
basting pieces together. Interlining to fashion fabric.
8/28/2019
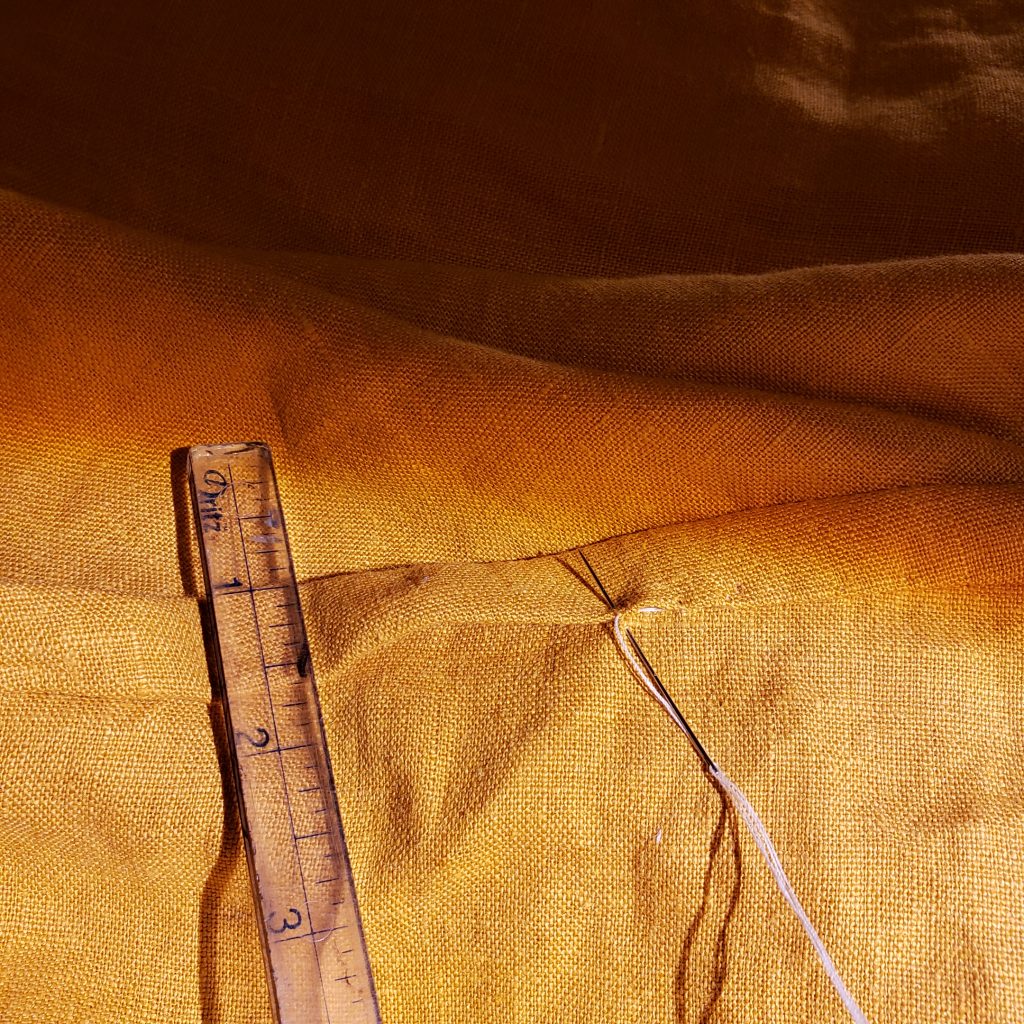
On the fashion fabric/interlining I sewed the straps onto the front and back and then prick stitched the seam allowance. Then I clipped the corners of the neckline and all the curves. Finally I folded and then pressed all the seam allowances into the garment back to the seam allowance mark around the outer edge (except for the skirt edge) and the neckline.
8/31/2019
I sewed the lining strap to the front and back and pressed that seam open. Then I clipped the corners of the neck and the curves and pinned the lining into the fashion fabric.
9/2/2019
Whipstitched the lining into the bodice. Neckline is done.
9/4/2019
Whipstitched the rest of the lining into the bodice.
Nipping the corner of the neckline 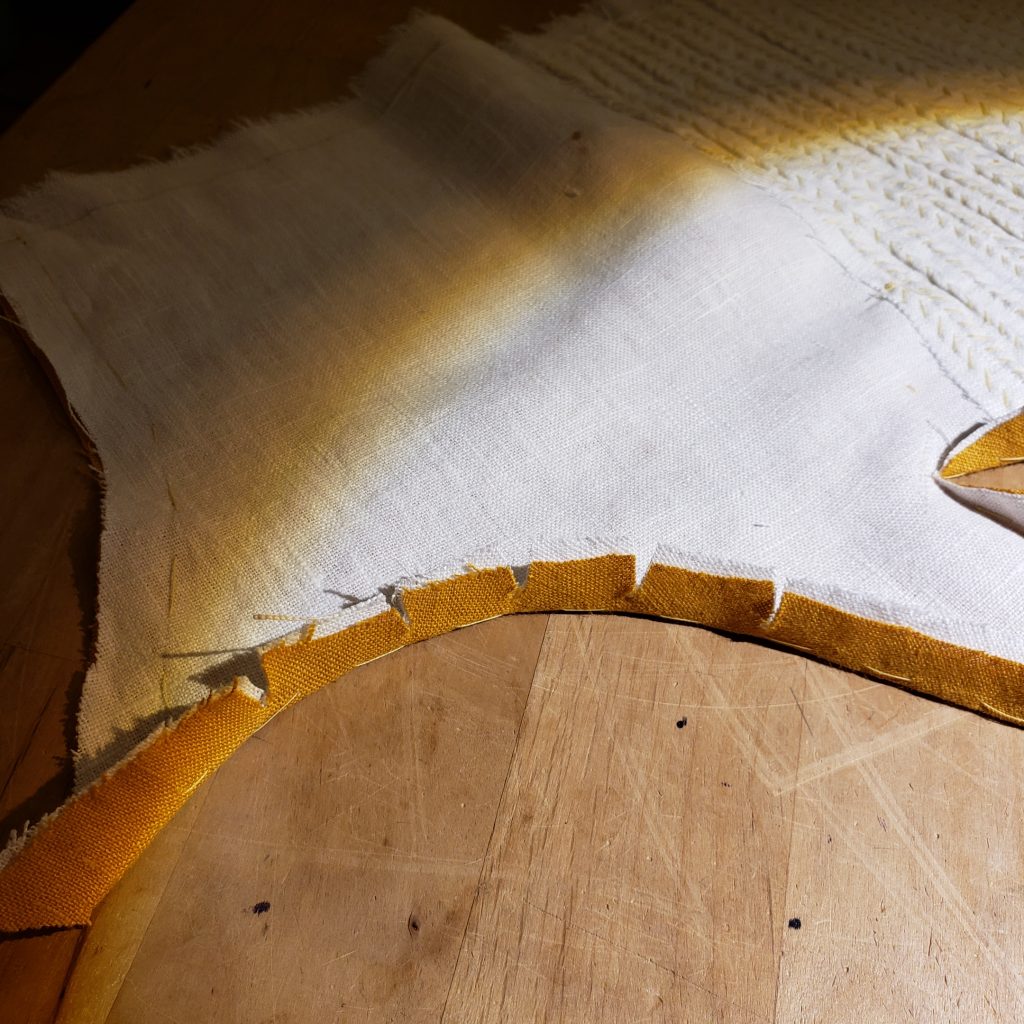
Nipping the curves 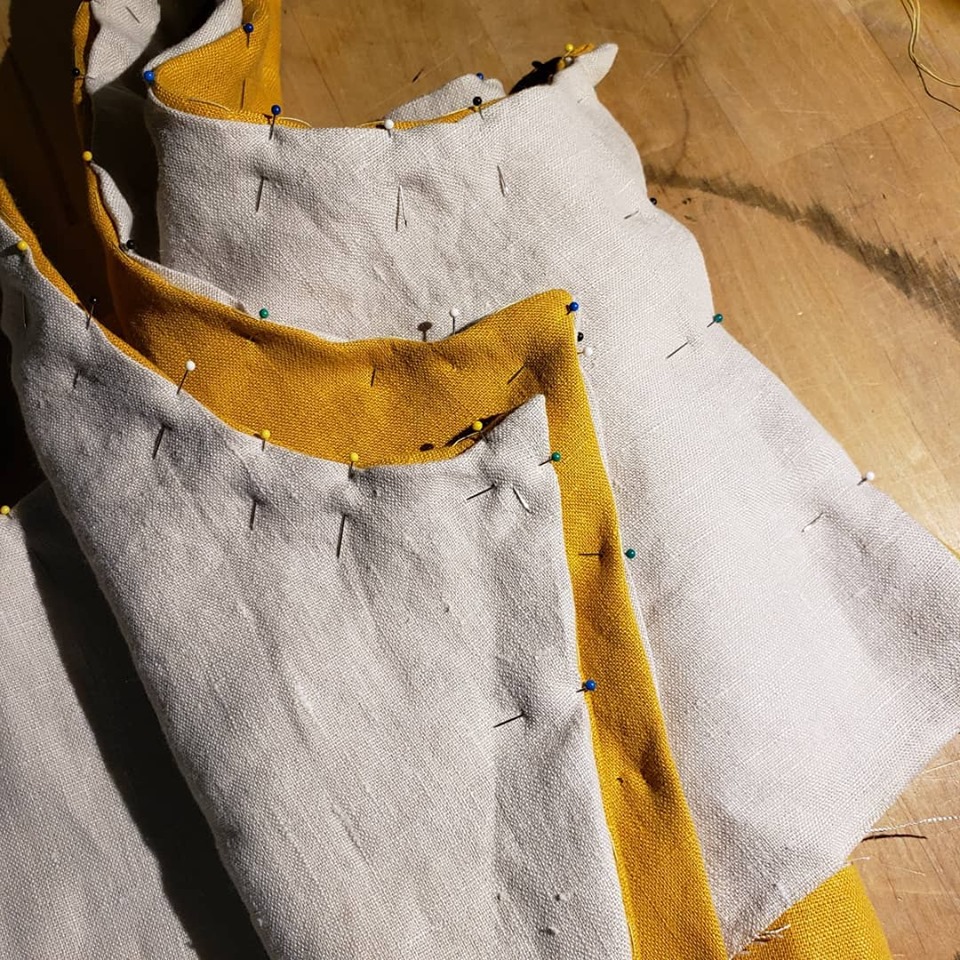
Lining pinned into bodice 
Whipstitching the lining into place 
Lining attached in bodice.
9/7/2019
Machined two (count them, 1, 2) eyelets before I got pulled away to other things. Meh.
9/9/2019
Managed to finish 25% of the eyelets. 1,001 interruptions. More tomorrow.

Eyelet marking and template 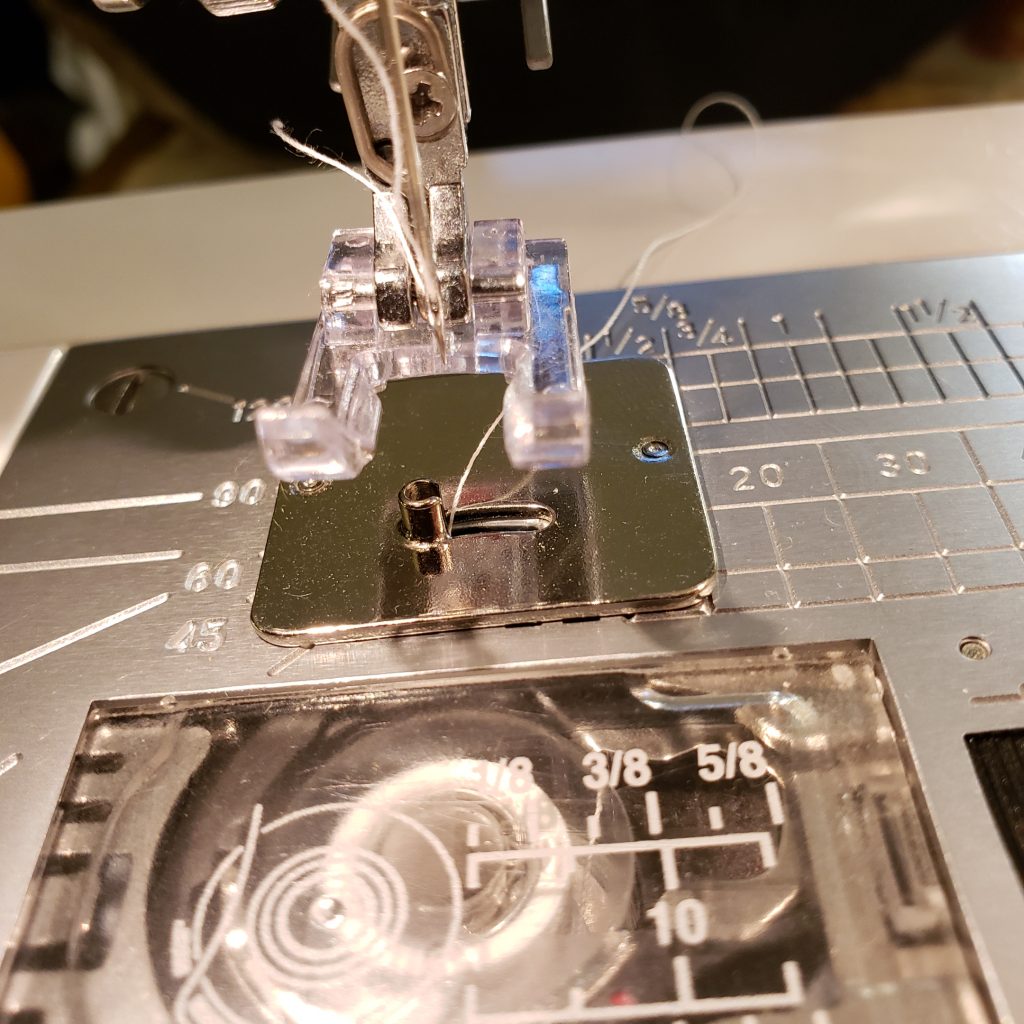
Machine made eyelet plate 
Hand sewn eyelet tools 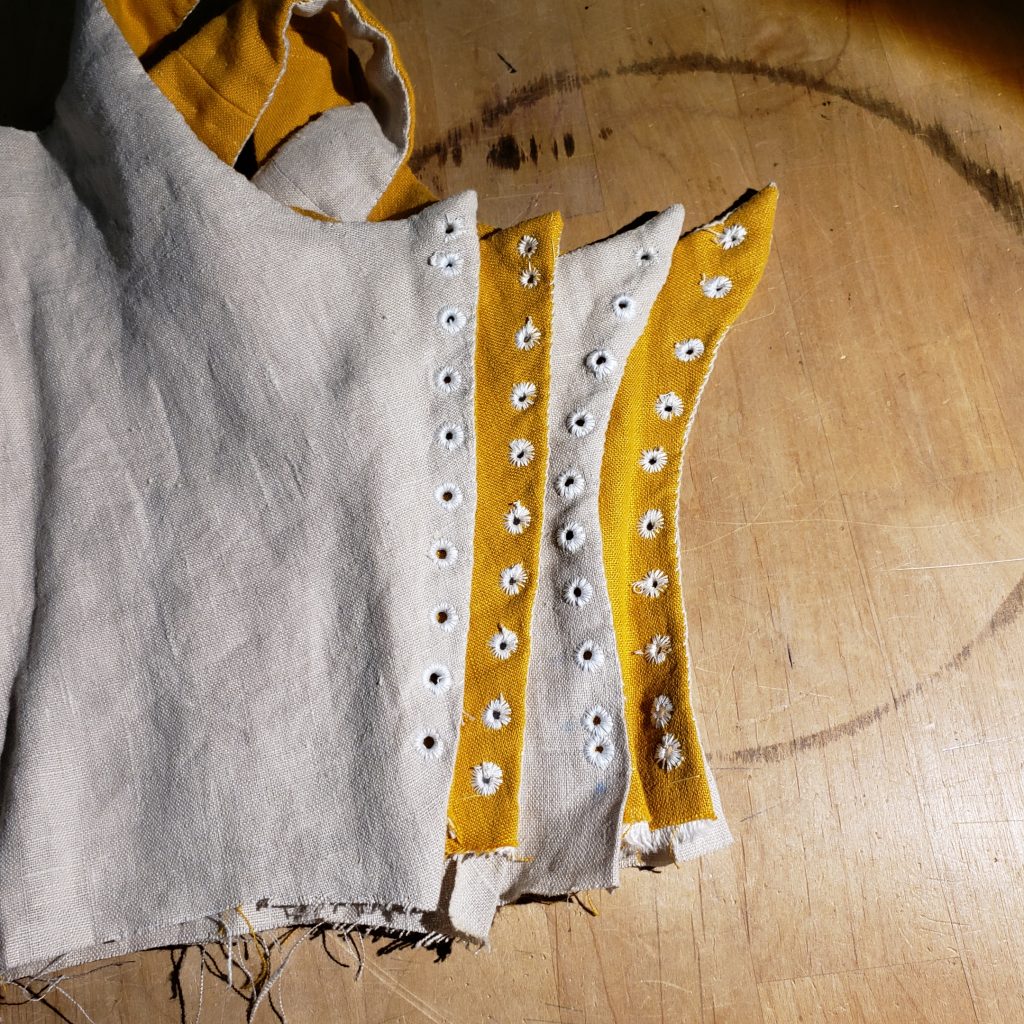
Finished eyelets 
Closeup of finished eyelets. Right most eyelet is by hand, the rest are by machine.
9/10/2019
Finished another 25% of the eyelets.
9/11/2019
Finished another 25% of the eyelets.
9/12/2019
Finished all of the eyelets including the hand done ones (the top-most eyelets go through more layers of fabric than the machine can handle).
9/14/2019
Cut out the skirt. Pieced all four panels. Sew bias to bias on the back panels (french seam). Hand finished 6 inches down each side of the front and back panels (the parts that will be next to the lacings).
Cutting out the front panel of the skirt. 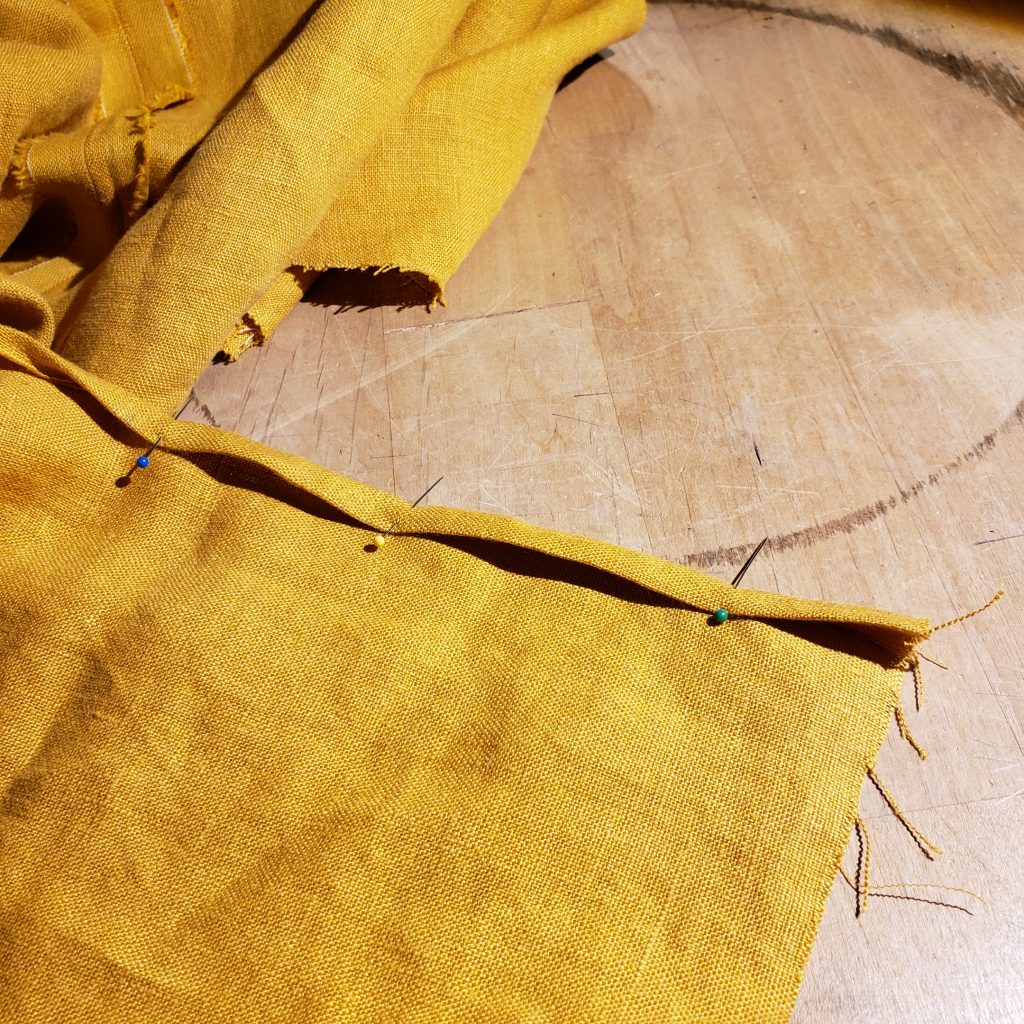
Doublefold at the edges which will be next to the lacings 
Front and back halves ready to be stitched together.
9/15/2019
French seamed the two sides of the skirt (bias to straight) and ironed the heck out of it.
Double-fold on skirt side openings 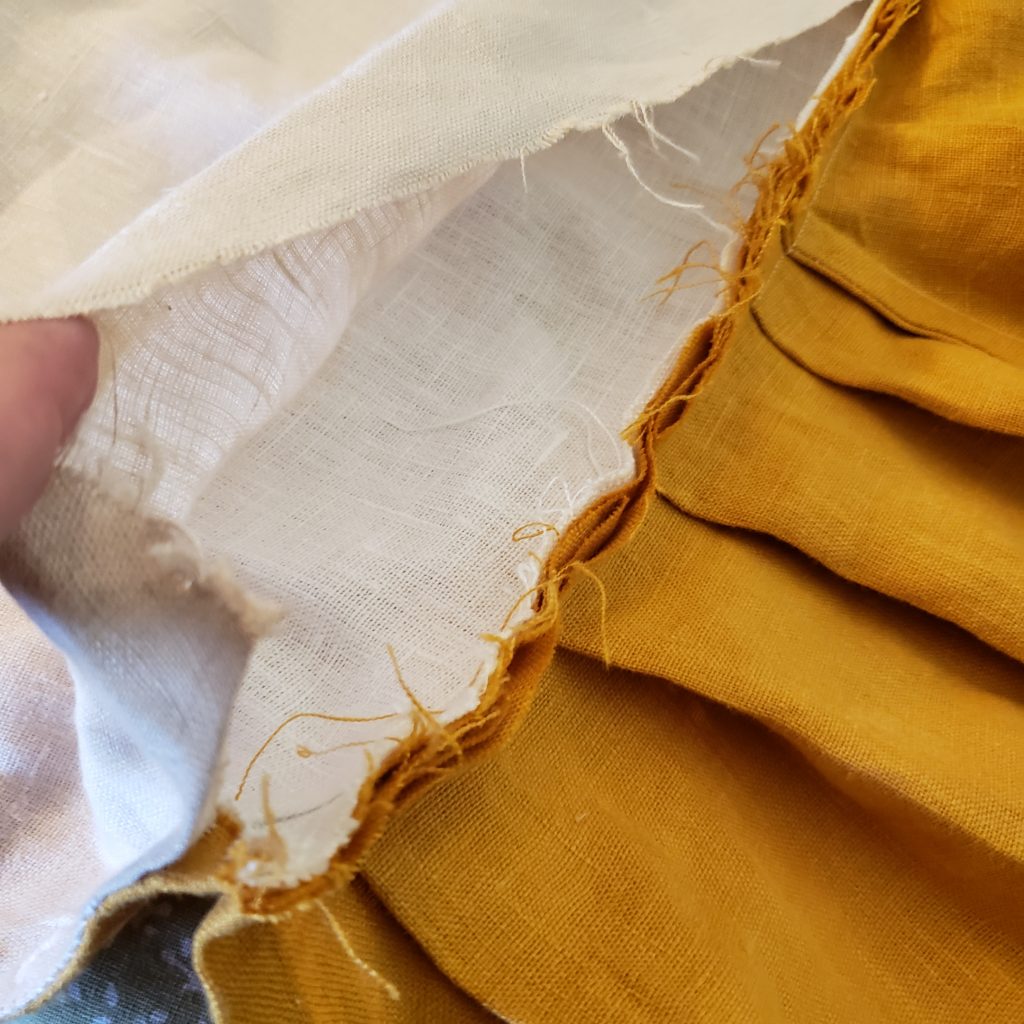
Skirt back pleated and attached to the fashion fabric layer of the bodice.
9/21/2019
Attached the skirt fabric to the fashion fabric layer of the bodice with machine stitching. Flipped this seam allowance to the inside of the bodice and then pinned the bodice lining in place. Then hand stitched the bodice lining down.
Also found white laces (I liberated them from the old yellow bodice I’d “temporarily” added to my Rust gown) and added laces to the sides of the bodice.
9/22/2019
A friend came to my house earlier today and marked a line on the bottom of the kirtle where the skirt hits the ground. I used this line to even up the bottom of the skirt. I’ve left 4 inches below the hits-the-ground line. I then made a quick double-fold hem at the bottom of the skirt and finished stitching half of it tonight.
9/24/2019
Me to a friend while at dinner tonight: Yes, I expect to have the kirtle done for Crown. I’m half way done with the hem. I’ll finish the other half probably tonight and then the tuck** tomorrow because I had to be extra and add a tuck.
I think I’ve finally identified it. I couldn’t think of the word earlier tonight, but the word is “vanity”. As in, I’m adding a tuck at the bottom of my skirt. This means that I have twice as much stitching to do at the hem and it’s adding a tuck that I will LITERALLY never use (no more babies for me) but I felt compelled to add it and I’m kind of proud of myself for doing it.
So there’s that.
** More info on the tuck: What the tuck?!?
TLDR: on kirtles in the late 15th/early 16th century, especially on middle/lower class women you see what looks like a “ruffle” at the bottom of the skirt. I first noticed this in 2012(post here) and have since come to believe this is a tuck taken in the fabric of the skirt. A fold of the skirt fabric is pulled to the inside of the skirt. The fold stitching would be removed during pregnancy to let the skirt down for women who maybe could not afford to have a special “pregnancy” dress. The lower-most edge is longer than the upper edge and it would have to be eased across the seamline which I believe would look like the small puckers seen on the lower fabric. After 7 years I’m finally planning to add one of these to my new kirtle.. for pure vanity and have started referring to it as my “vanity tuck”.
So anyway, I finished the double-fold hem tonight and started on the tuck.
Adding the double-fold hem 
Measuring up from the now finished bottom edge. This will be the bottom of the tuck. 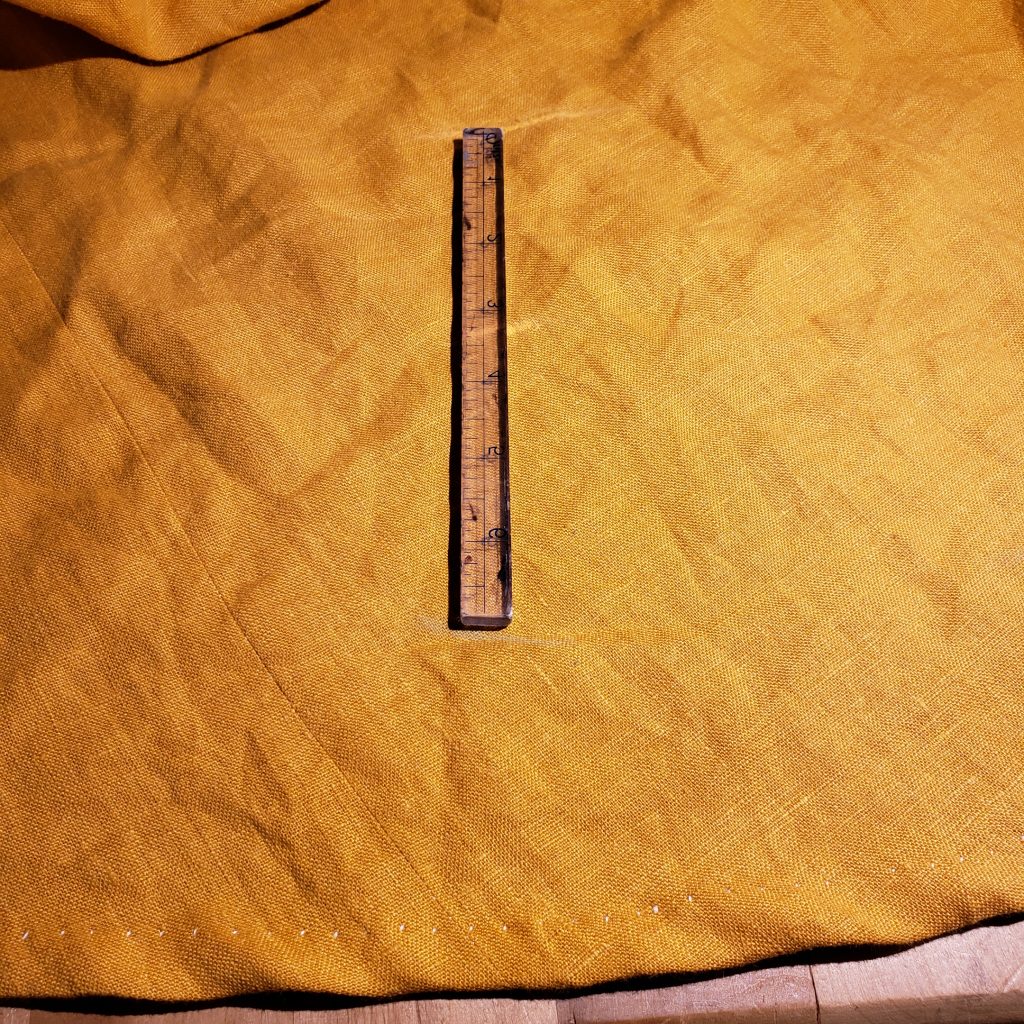
Measuring up from the blue hits-the-floor mark. This will be the top of the tuck. 
Matching the top and bottom marks and pinning them together. 
Finished “vanity tuck” 
Another view of the finished tuck. 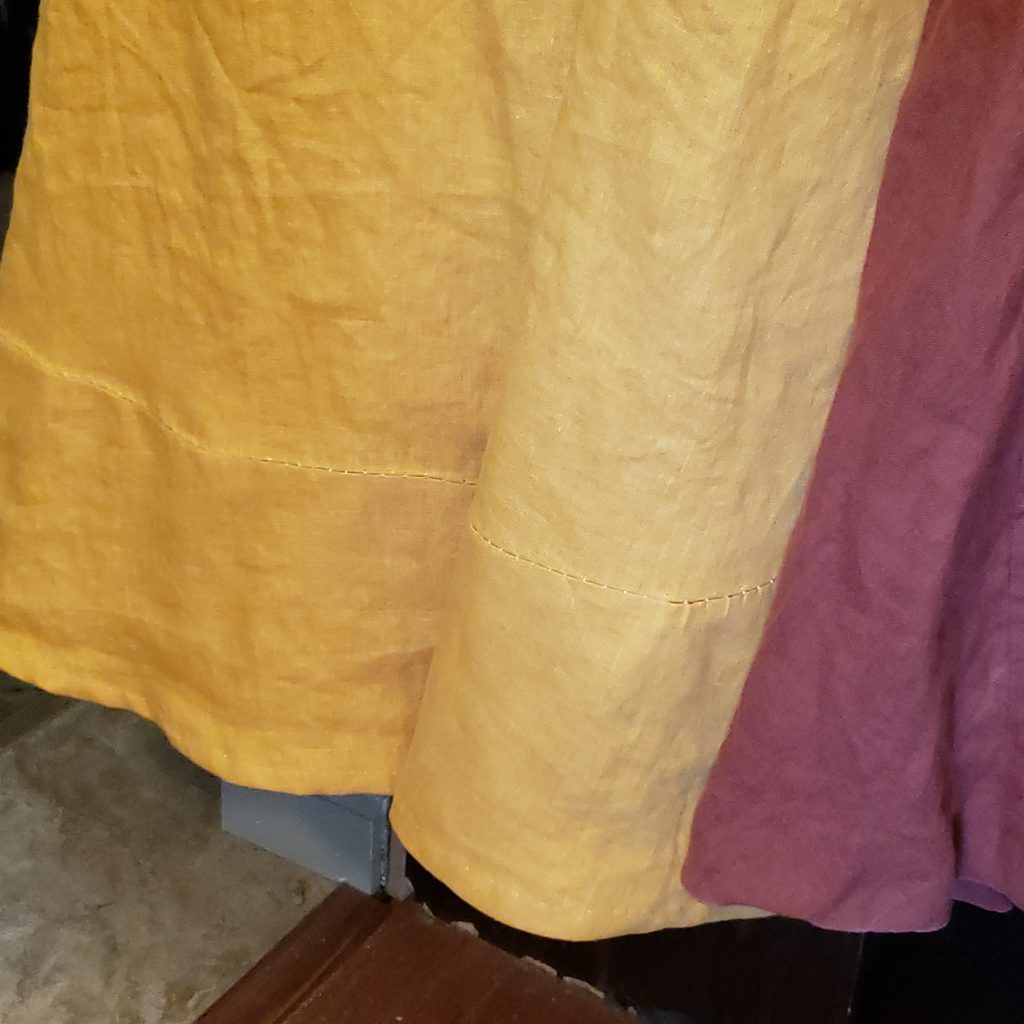
Finished tuck on the Autumn Gold kirtle hanging next to the Rust gown.
Here’s what I have. A few days ago I tried on the kirtle and had a friend mark a line where the skirt just barely hit the ground (ie. if I were adding a hem then the fold of the hem would need to be on the blue chalk line). Then I checked all around the skirt and trimmed the excess fabric below the blue mark to be even at 4 inches below this mark (the largest amount which I had available all around the skirt). Then I went all around the skirt and added a small double fold hem (~1/2″ width). Now I am using my magic ruler and marking a line which is 6.75 inches above the new bottom edge of the skirt and another line which is 6.75 inches above the blue chalk line. Finally I will match up these two lines to create a tuck which will be on the inside of the skirt. By taking out the tuck I will be removing the same amount of fabric from the skirt as is found below the blue marks which will cause the bottom of my double-fold hem to just barely brush the ground (I hope) with the tuck stitch line 6.75″ above the hem.\

Autumn Gold kirtle front 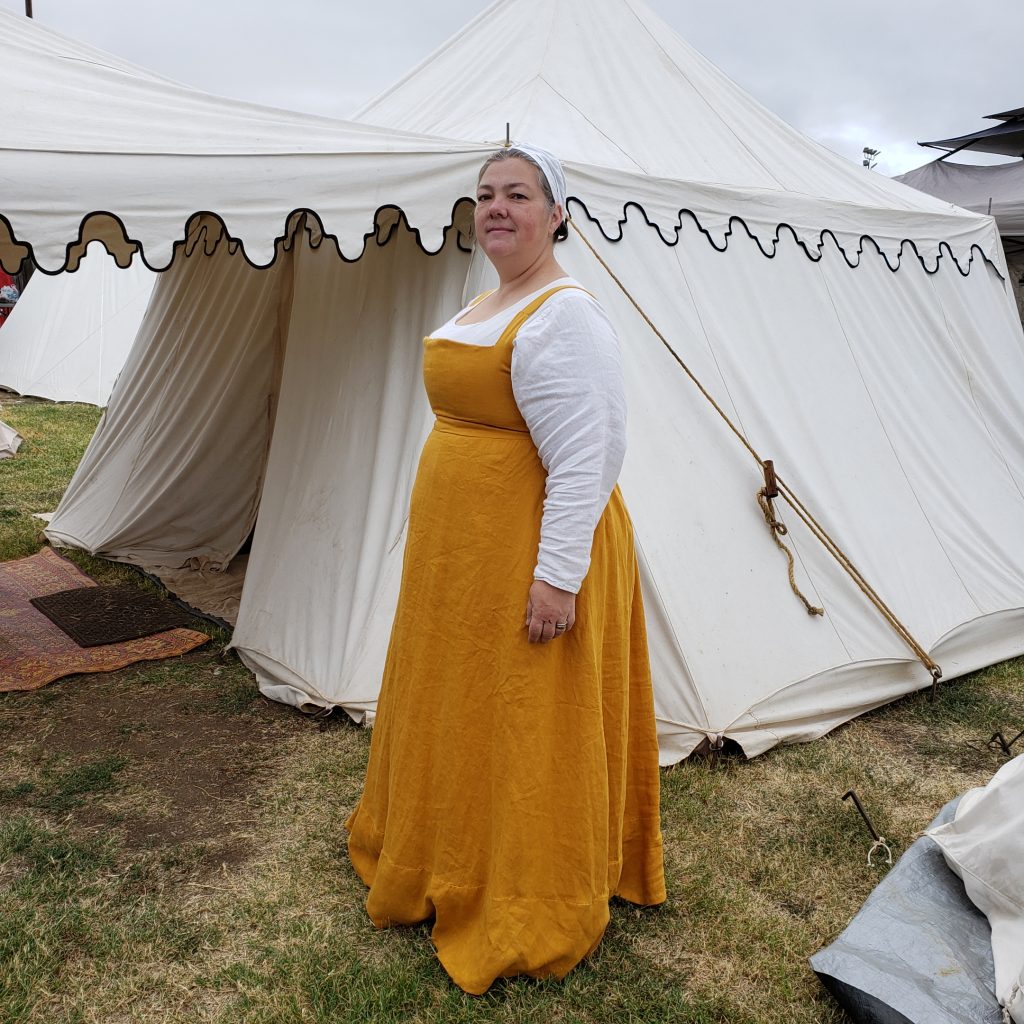
Autumn Gold kirtle side 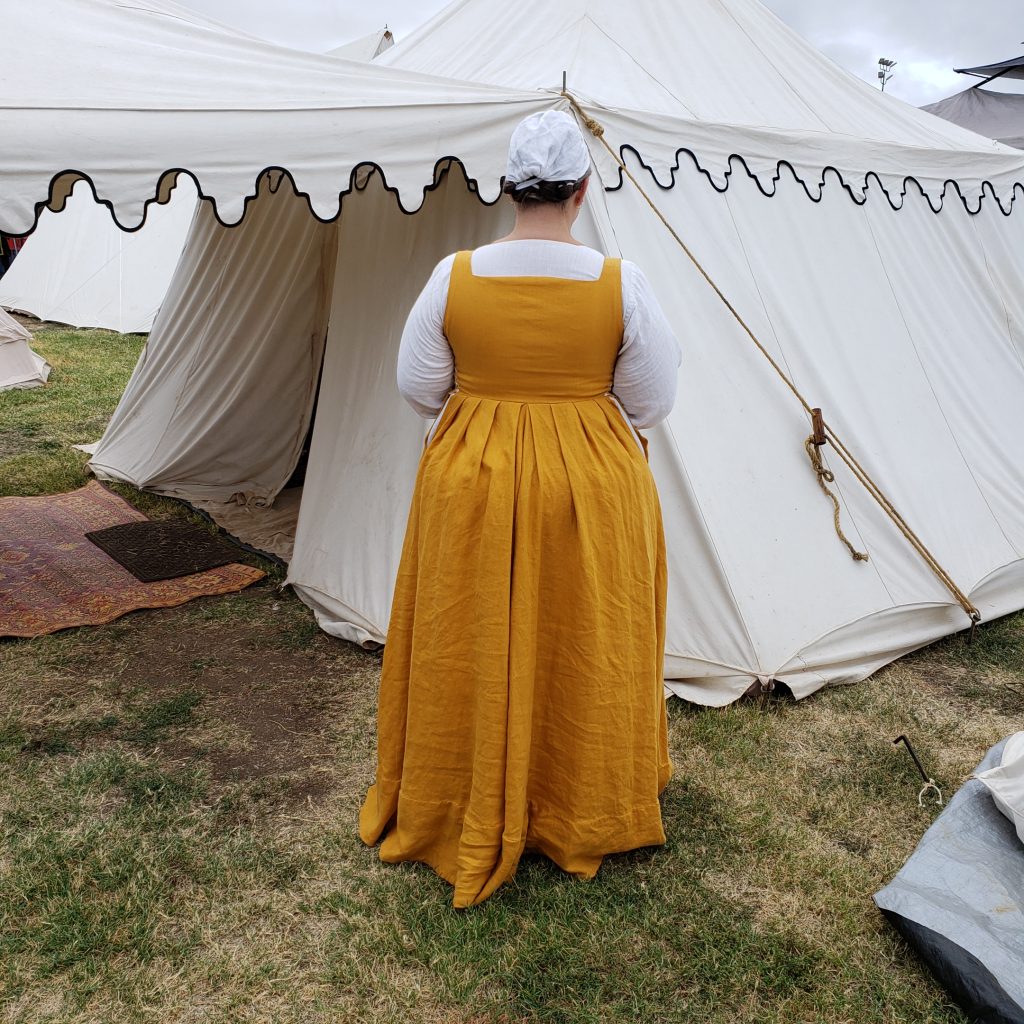
Autumn Gold kirtle back 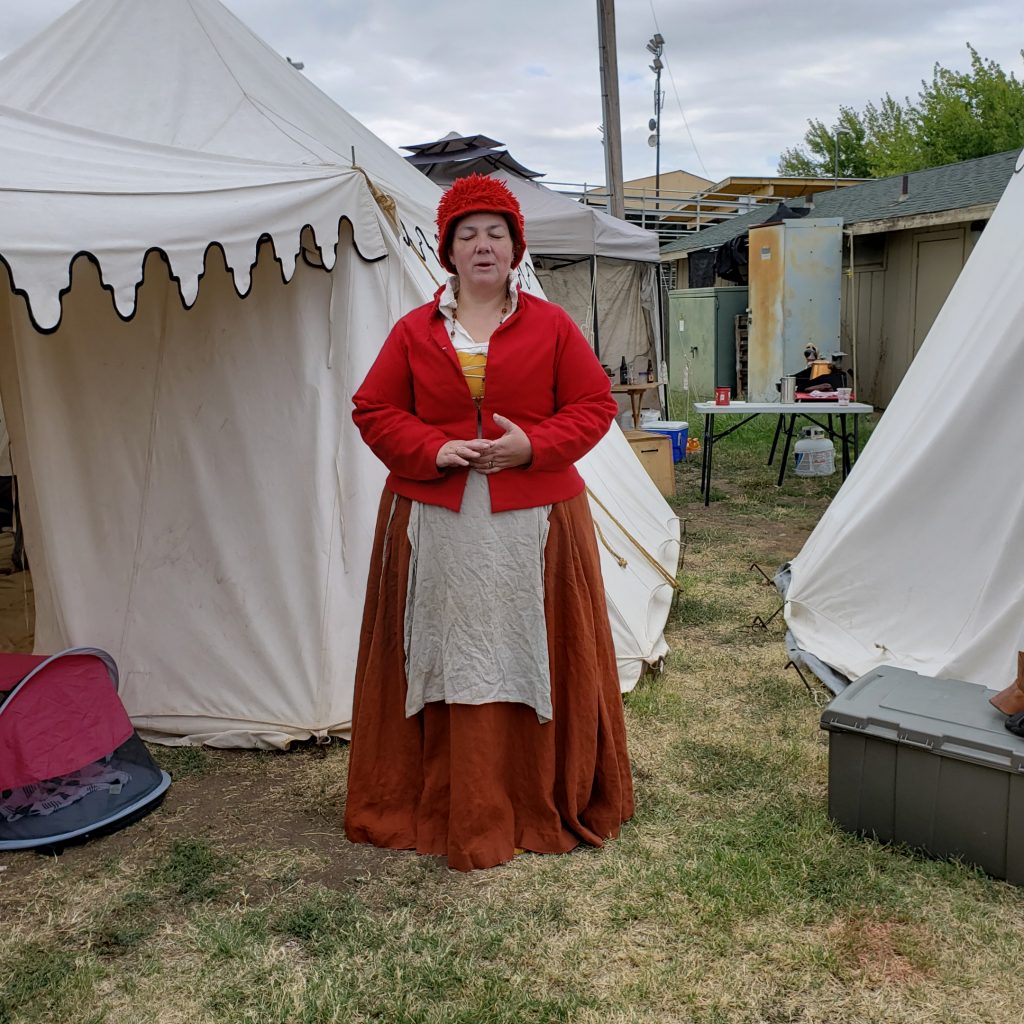
Full outfit with eyes closed (of course) 
Selfie (my arms are too short to actually show the dress ) 
Full outfit Photo by Konstantina Johnson
POST-MORTEM
- I’m totally done making side laced kirtles. I’ll try and avoid them in future.
- That said, if I do make another side-laced kirtle I’ll consider adding eyelets/lace on only one side.
- I also don’t really love the turned in edges on the bodice. I like work with bindings better.
- In staring at my skirt pattern and the itty bitty gores it creates in the center back I think I need to widen my skirt panels to make betters use of the fabric. I think the front and back panels can be widened at the bottom while using the same amount of fabric. I’ll have to play with the pattern pieces and draft new ones.
- The first time I tried this on I noticed that the width of the front panel is pulling the side slit out of alignment. That front panel definitely needs to be widened.
- On the next kirtle I’m also interested in trying out a padded hem. https://adelheitsworkshop.wordpress.com/2015/04/29/building-a-better-skirt-padded-hems/. Though now that I think of it, the tuck also serves this same purpose.
- After the first wearing I can definitely say the hem is too long. I’ll pull out the tuck and re-do it pulling a bit more fabric into that. Other than that, I loved the fit on this it was very comfortable.
- Looking at the pictures I can still see a bit of wrinkling on the center front. I really didn’t notice any difference with the pad stitching. I think I’ll wear it a few more times before I decide whether I’m going to continue to do that.
- Is it bad that my favorite view of this is from the back? I adore the way the pleats turned out. I decided to try out an inverted box pleat at center back with knife pleats on either side I LOVE LOVE LOVE the way this worked and I’ll continue to do that.
- OH! I forgot to add.. because I’d done two side laces I was able to run the long laces across my back and tie them under the skirt. This was MUCH easier to do for tieing off than trying to tie off at the bottom of the side opening. I know someone suggested this to me.. and I can’t remember who.. but that worked splendidly well. I’ll continue to do that as well on these side-lace kirtles.
SOURCES
Gnagy, Mathew. The Modern Maker Vol. 1: Men’s Doublets. Charleston SC: Printed by creativespace.com, 2014. Print.
Gnagy, Mathew. The Modern Maker Vol. 2: Pattern Manual 1580-1640: Men’s and women’s drafts from the late 16th through mid 17th centuries. . Charleston SC: Printed by creativespace.com, 2018. Print.
BINGE LIST
Inkheart (Netflix) – B I have a soft spot fro Brendan Fraser. This movie was nice.. but it went to obvious places using obvious paths.
Next (Netflix) – B I have another soft spot for Nicholas Cage. I would count this movie as a bit better than Inkheart but only barely. A guy can see the future, but only a little bit of it. They zigged from 2 minutes to “however long as long as he concentrates” and kind of lost me for a bit. Still. Interesting concept.
The Boys (Amazon) – A+ What if we removed the integrity supposedly inherent in being a Superhero and instead talked about what would really happen if “Normal” people ended up as supes. Superheros have super coping mechanisms and still do stupid things that are destructive and self-destructive. What if we added a layer of corporate soul-less capitalism on top of that? Very dark. TV-MA
Umbrella Academy (Netflix) – A+ Finished re-watching this. It was just as good the second time. Super powers give you super problems for which you come up with super coping mechanisms with a sprinkling of time travel. Highly recommend. I can’t wait for season two.
Another Life (Netflix) – B This one is a little uneven. I love the concept of the story but there’s a lot of holes that they just kind of gloss over. If they can make an interstellar journey in 7 months then that implies they figured out how to go faster than the speed of light.. that needs a little bit more discussion. Also.. what kind of idiot does this kind of idiotic things when faced with a new environment… hey, we’re on a completely non-earth planet.. let’s just pop our face masks and breathe the air here.. because that can’t at all be a bad idea. I made it through the whole thing.. but man, it was a slog. I spent a lot of time yelling at my TV. Why you so dumb?
Here Alone (Netflix) B Super slow to develop and not a lot of character development. A woman alone in the desolation of a zombie epidemic struggles to trust two people who show up one day. AKA: It’s the end of the world.. but hey teenagers (who are surprised even after most of the world is dead that what’s left doesn’t revolve around them) still have angst and make awful decisions. Ya think?
The Good Place Season 3 (Netflix) A+ I’m still loving this show. I’ve read that it’s been renewed for one more season. I’m anxious to see what happens next.
Supernatural Season 14 (Netflix) B- I’m a completionist and I hate that I haven’t seen all of this.. but this season is kind of a slog. I’m having a hard time sticking to it.
Agents of SHIELD Season 6 (Netflix) I’m bothered that they completely skipped The Snappening… but suspect that will be covered in the multi-verse theory which seems to be an emerging theme in the Marvel Universe.
Timetrap (Netflix) B While searching for their missing archaeology professor students (and the professor) discover a cave where time moves differently. This did NOT go where I’d expected it to go. Interesting, but kind of ended without really reaching a tada moment.


